How To
This section contains a information on how to use and get the most out of MC Rockets.
How to Glow
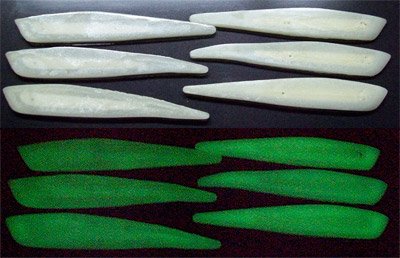
#1 with Ultra Glow
All MC Rockets contain the Next Generation glow powder called strontium aluminate, which glows 10 times brighter and 10 times longer than the original (zinc sulphide.) I use only premium green glow, which is the brightest and glows longer than all other glow colours I tried plus the fact that fish see different hues of green, and most of all, it works.
This premium glow powder - which not only absorbs light, but then re-emits it slowly over time - is activated by a light source high in UV, such as black light or sunlight. Time required for a full charge (Glow time 4-5 hours, probably longer):
- Sunlight 5 min.
- Black light 10 min.
- Halogen 10-15 min.
For the early risers, a double-bulb 12V portable black light (found at Canadian Tire in the car accessory department) works well. We use a box lined with tinfoil, with a light at the top and one at the bottom. Do not place a Rocket directly on top of any plastic lens as it could have a chemical reaction, dulling the lens.
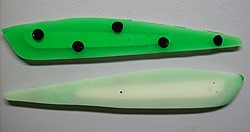
Frog with colour on front (top)
and glow on the back (bottom)
Wrap the lens a couple of times with cling-free clear food wrap. A simple fix.
All Rockets contain glow on the back side, while the single digit colour numbers have glow throughout (Ultra Glow). Simply apply a UV light source to the back side, as well as the front on the Ultra Glows. They will glow for 4-5 hours probably longer with the brightness decreasing as time elapses. And it can be charged hundreds of times without losing its brightness. Just remember:
IF IT DON'T GLOW, IT DON'T GO.
How to Rig
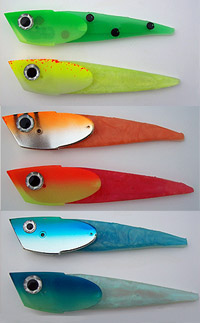
Rockets matched with teaser heads
The MC Rocket was designed for use in a large Rhys Davis teaser head, normally used for cut bait herring strips. Other teasers' heads will also work but:
- Some are narrower, making it more difficult to fully insert a rocket.
- Some holes are a smaller diameter, so a large round toothpick cannot be inserted properly.
- You can reduce the fin effect of the teaser head by bending the fin back to the right, allowing the roll to be more controlled by the Rocket.
- You can match the colour of the rocket to a similar colour teaser head.
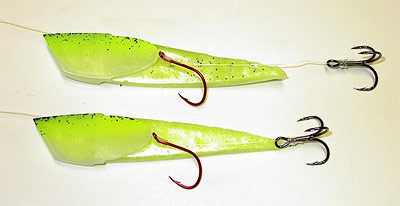
To begin, lubricate the head of the Rocket to be inserted, with either scent or a little saliva. Insert fully. Insert a large, round toothpick into the teaser head through the hole in the Rocket's spine and out the other side, breaking the toothpick flush on both sides. Then insert a regular toothpick through the fin hole, just tight enough to keep the eye of your hook at the tail of the bait. (So the hooks don't get caught in the plastic and impede the action.)

Rocket in teaser head with toothpick in fin hole
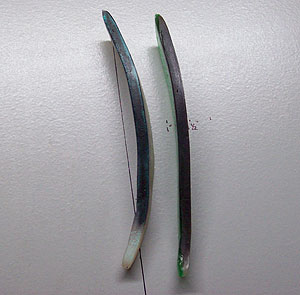
Photo 1: Starting a bend for 1.8 2.2 mph (left)
Bend for 2.5 3.0 mph (right)
How to Tune
Tuning your Rocket involves bending the Rocket in the same direction as the teaser head fin, to the left as show in Photo 1. The amount of bend required depends a great deal on your speed and the type of action you want. Recommended roll is 1-2 revolutions per second. The faster your speed, the less bend required.
You can also bend the Rocket to the right, which will change the direction of the roll to counter-clockwise, countering the effect of the teaser head fin. However, your hooks will be further from the Rocket.
Speed Your Choice
For many years, my normal trolling speed was 2.5 mph 3.0 mph, which was necessary for decent action using spoons. When using a Rocket, you can tune it so you can get your desired action from 1.5 mph to 3.0 mph. It's all in the bend. My favourite speed is 1-8 2.2 mph: Bend in photo.
Set your desired speed, put the rocket in the water beside the boat, check out the roll and adjust it. Continue to adjust until you get that perfect roll. The smallest adjustment can make a significant difference, especially at faster speeds. Don't be afraid to bend the spine. Subtle bends do not weaken the spine, and every change creates a new action.
Re-tuning after a Hit
When a fish hits, the Rocket is normally bent 90° to the right (as shown in Photo 3) and shoved up the leader. Simply reposition your hooks and bend the Rocket back to the left, test and fine tune (as shown in Photo 4.)
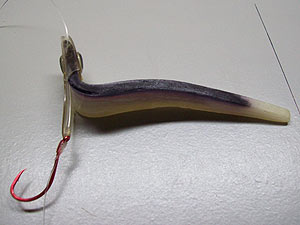
Photo 2: After a hit
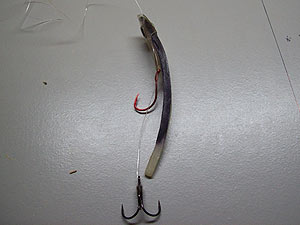
Photo 4: Re-tuned
Different Setups (Flashers Twinkies Nude)
MC Rockets have proven to be extremely effective using a variety of different setups.
Running a Rocket nude (without a flasher) works well when using lead core or copper, 4'-5' behind a Dipsey; or when running a 5'-10' lead behind a Christmas Tree attached to your cannonball, especially early morning or when you see fish streaking at your cannonball.
But the most popular method is behind a flasher, 48 to 72 of 30lb-40lb test fluorocarbon leader material, with 2-3 twinkies - keeping the last twinkie at least 18-24 in front of the Rocket. (Closer will impede the action.) When running a 3 fly rig, especially with a Magnum Rocket, some flashers will not rotate, but act more like a dodger. Spin Doctors are my favourite as they rotate well at all speeds.
When running off a rigger, the distance behind the cannonball varies. Normally 10'-15' works best early morning. As the sun gets higher in the sky, we extend our leads from 15'-30'. On some days, a long 50'+ lead works best. Your choice. Experiment.
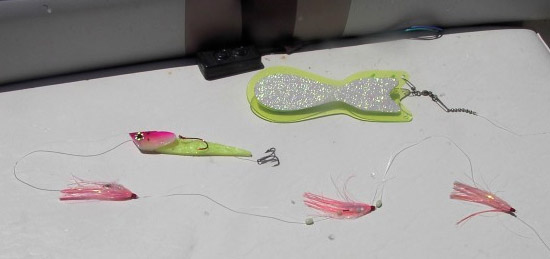
Make a Sliding Snell Setup
The sliding snell has been derived from the cut plug, whole bait technique for fishing kings in B.C. I used it back in the 80's to run cut plug alewives. It works great on the teaser head rigs.
I use 30 or 35 # Seaguar fluorocarbon for the leader material and 20 # mono to snell the sliding hook. Mono is a lot easier to work with and ties a better snell.
1. Down through the eyelet with the 20 # mono: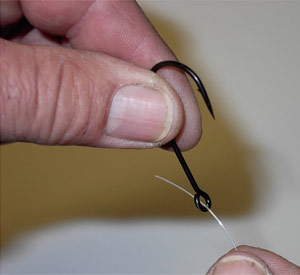 |
2. Make a loop and then up throught the eyelet. 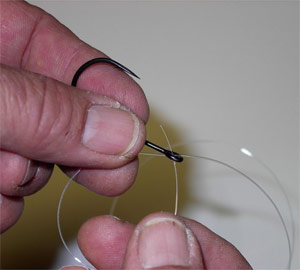 |
3. Roll the loop to the top with the tag end sticking out about 1 inch. 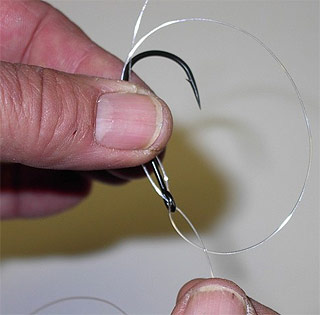 |
4. Start the 35 # fluorocarbon up through the eyelet. 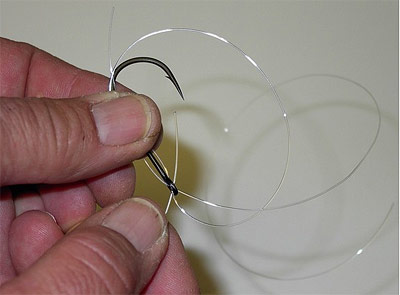 |
5. Both tag ends stick out the top about an inch. 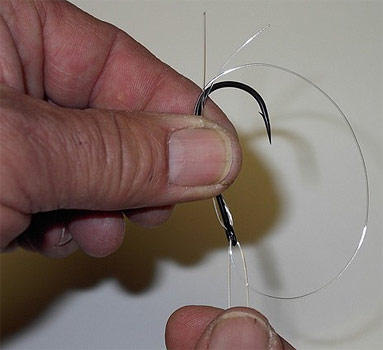 |
5. Grab the 2 lines and the eyelet of the hook between the right thumb and index finger. Hold it very tight, and with the left hand index and middle fingers, go through the loop and start wrapping the line around the hook shaft in a twisting and rolling motion. This is the tricky part. 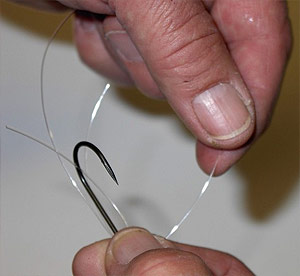 |
6. Don't allow the line in your left hand to twist like this. 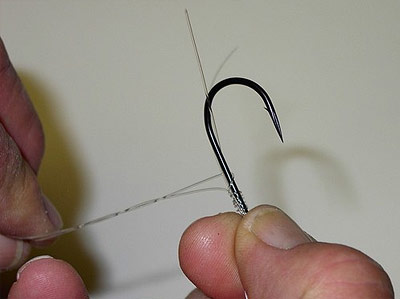 |
7. You need to have your middle and index finger through the loop in the line. 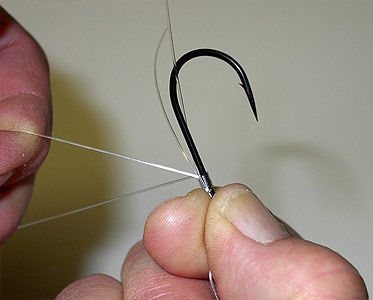 |
8. Your middle finger keeps the loop secure while you move your thumb and index finger up, and now hold the snell tight between them. 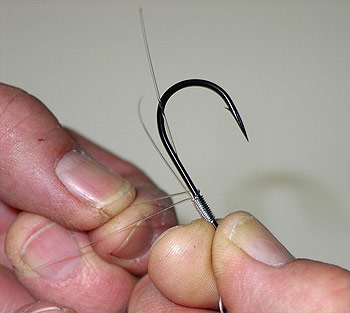 |
9. Like this. 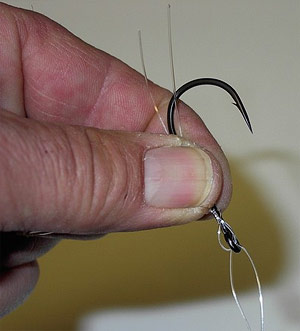 |
10. Notice the loop is still being secured by the middle finger on the left hand. With the right hand, pull the mono tag end down and at the same time release the line from the left middle finger. 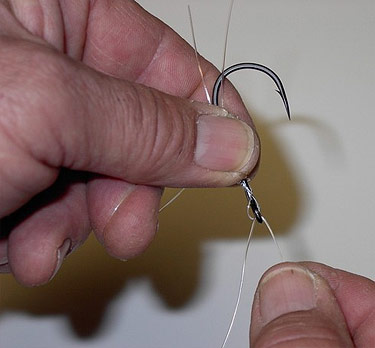 |
11. Should look like this: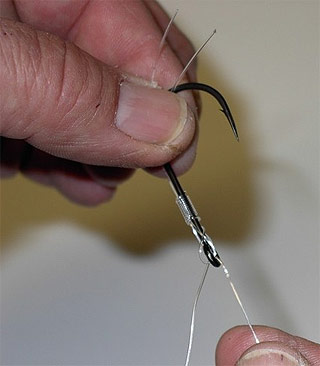 |
12. Grab the hook with your right hand and pull up slightly to tighten the lead loops at the eyelet end. 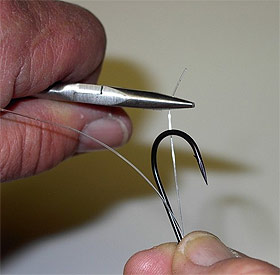 |
13. Finish pulling down on the lower tag end to seat the snell against the eyelet. 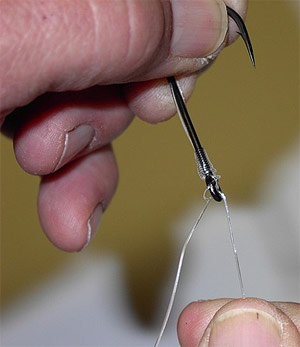 |
14. Snip off the upper and lower tag ends after you have the snell at the proper tightness. 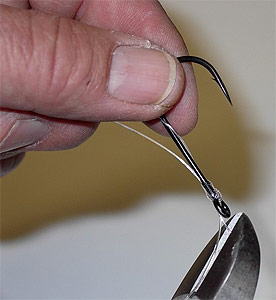 |
15. Now pull a couple of feet of fluorocarbon through the snell knot and snell the end hook. Should look like this when you are done: 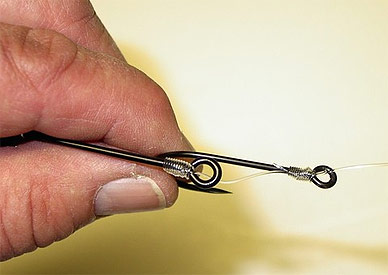 |
You could put the sliding hook in a fly tying vice like this to start with, until you get the hang of tying free hand.
|
The best part is that you will never need to use a tooth pick in the back of the teaser. Your cut bait will last a lot longer because there is a less chance of it getting mangled. You can adjust the rig to let the back hook trail as far back as you want it to.
|
I prefer this length. |
This is the late summer rig that I use. 3/0 front and a 4/0 trailer. 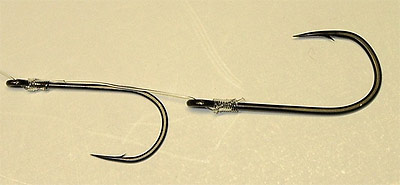 |
Home | Store | Contact
© Copyright MC Rocket, all rights reserved.

